This week a second new module for processing Stripe payments has been added to FormBuilder. We’ll take a closer look at it in this blog post, plus we’ve got a demo of it here too.
About Stripe Processor for FormBuilder
The Stripe Processor Action for FormBuilder enables you to process a credit card payment via the Stripe Checkout service alongside your FormBuilder form. This is similar to the existing Stripe Inputfield for FormBuilder (which uses Stripe Elements), but it works an entirely different way that makes it compatible with 3D Secure transactions that require an extra verification step.
3D Secure is used by the Strong Customer Authentication (SCA) regulation in Europe for card payments. 3D Secure is optional in regions outside of Europe but can still be used as a fraud prevention tool.
FormBuilder handles Stripe Payments by presenting the payment screen after the user clicks the “submit” button on the form. FormBuilder queues the form submission and doesn’t consider it “submitted” until Stripe officially contacts ProcessWire FormBuilder via a webhook to notify it that the payment has been made.
This module is available for download to FormBuilder users in the FormBuilder support and downloads board (login required).
Demo of FormBuilder using this module
In the form below you can buy a cup of coffee. It's in Stripe test mode, so it doesn't actually charge anything. When you reach the Stripe payment screen, use any of the test card numbers. Pair that with any future expiration date, any CVV, and make up anything else it asks for.
Buy a cup of coffee
Requirements
An active FormBuilder support subscription with FormBuilder v45 (0.4.5) or newer.
ProcessWire core 3.0.164 or newer.
Stripe account that is ready to use, along with the API keys to access it. The API keys are available in your Stripe control panel in: Developers > API keys.
For the form(s) where you intend to use this module, they must have the “Save to entries database” action selected (as it is by default).
Benefits and drawbacks
In addition to enabling support for 3D Secure transactions, there are some other benefits to the Stripe Processor Action relative to the Stripe Inputfield:
The actual payment screen and 3D Secure verification is fully hosted and managed by Stripe and protected by their security.
Built in support and mobile ready for Apple Pay and Google Pay.
Ability for customize the amount and line items (i.e. cart) that are charged with ProcessWire hooks.
Configuration options to collect shipping and/or billing addresses from Stripe, with ability to specify countries you ship to.
While some prefer to have the payment screen separate from the rest of the form, others prefer to have the payment screen integrated into the FormBuilder form. The Inputfield provides everything in one form, whereas the Processor Action isolates the payment from the rest of the form. This isolation is what enables it to support 3D secure and other payment methods. However, if integration into the form is what you need (and you don't need 3D Secure) then the Stripe Inputfield for FormBuilder is what you want.
Because the Processor Action depends on Stripe webhooks contacting it separately from the user, it is more difficult to test the Processor Action on localhost and development environments that may not be http accessible to Stripe. To get around this, you’ll see a “local test” mode in the form settings for this module. This is useful for testing, but it’s still preferable to do the installation and testing on a server that can receive web hooks from Stripe.
The Stripe Inputfield supports subscription and recurring transaction options that the Processor action doesn’t yet have built in. However, it can support them with hooks already, but I haven’t yet experimented with those options enough yet to officially support them, though will soon.
How it works
When installed and properly configured on a FormBuilder form, the user fills out the form as usual and clicks the “submit” button when they are done. Assuming all required fields are present and validated, etc., it is time for the payment portion of the form. Rather than displaying a “thank you” or “success” message on the following screen, it instead queues the form to be submitted (saving it as a partial entry) and redirects to a Stripe Checkout payment URL.
The payment URL is hosted directly by Stripe, which maximizes security and enables support of any transaction type and feature (such as 3D Secure). The URL is typically customized in your Stripe account settings to brand it in a manner that relates to your site.
Once the user completes their payment on the Stripe screen, Stripe contacts FormBuilder directly through a separate HTTP request with a webhook. The webhook contains information about the transaction that took place. If the transaction was successful, FormBuilder submits the queued form, converting it from a partial entry to a final entry, sends administrator emails, and executes any other actions configured for the form. This webhook may occur immediately after the user completes the transaction, or it may occur a brief time later, depending on how busy Stripe is at the time.
Separately from the webhook, Stripe redirects the user back to FormBuilder running on your website after they have successfully completed the transaction. At this time, they will see the “thank you” or “success” message from FormBuilder.
On the other hand, if the user cancelled the transaction, they are instead returned to the FormBuilder form as they left it, with the the fields still filled in. This gives the user another opportunity to complete their transaction, should that be their intention.
You can optionally specify your own success and cancel URLs, should you want to redirect to something other than the defaults that FormBuilder provides.
Managing webhooks
This module uses the Stripe API to automatically create the needed webhooks at Stripe. Meaning, it is not necessary for you to create them yourself in the Stripe control panel. To see what webhooks are installed, go to the FormBuilderProcessorStripe module settings in Modules > Site. At the bottom will be a list of webhooks that are installed. If you see any redundancy or unnecessary webhooks (perhaps for forms no longer present) you can use the checkboxes to delete any webhooks on this screen.
Specifying charge info at runtime
Should you want the details of the charge (such as the amount) to be dictated at runtime rather than as a static setting, you can do this with a hook:
$wire->addHookAfter('FormBuilderProcessorStripe::getChargeInfo', function($e) {
  $e->return = [
    'name' => 'Widget',
    'description' => 'Our widgets make you happy',
    'amount' => 200, // i.e. $2 USD
    'currency' => 'usd',
    'quantity' => 2, // makes the total $4
    'images' => [ 'https://domain.com/widgets.jpg' ]
  ];
});
If you just want to modify something about the default charge info, then you can easily do that as well with the same type of hook:
$wire->addHookAfter('FormBuilderProcessorStripe::getChargeInfo', function($e) {
  $e->return = array_merge($e->return, [
    'amount' => 300,
    'quantity' => 2
  ]);
});
If you want to specify a cart of items to charge, then you’ll want to instead hook the getLineItems() method, and specify info for multiple items:
$wire->addHookAfter('FormBuilderProcessorStripe::getLineItems', function($e) {
  $e->return = [
    [
      'name' => 'Widget',
      'description' => 'Our widgets make you happy',
      'amount' => 200, // i.e. $2
      'currency' => 'usd',
      'quantity' => 2, // makes the total $4
      'images' => [ 'https://domain.com/widgets.jpg' ]
    ],
    [
      'name' => 'Barbell',
      'description' => '45 pound bare steel powerlifting barbell',
      'amount' => 22500, // i.e. $225
      'currency' => 'usd',
      'quantity' => 1,
    ]
  ];
});
Performing custom actions after a successful payment
After a user completes payment, you may want to trigger some action automatically, such as sending them an email or file, upgrading their access, etc. You can do this with a hook to the chargeSuccess() method:
$wire->addHookAfter('FormBuilderProcessorStripe::chargeSuccess', function($e) {
  $entry = $e->arguments(0); // array of data for submitted form entry
  $email = $entry['email']; // you had a field named 'email' with email addr
  $secretCode = '123abcdef';
  wireMail()
    ->to($email)
    ->subject("Your order")
    ->body("Thank you for your order, your secret code is: $secretCode")
    ->send();
});
Let’s say you wanted to upgrade a logged-in user’s access with a “member” role:
$wire->addHookAfter('FormBuilderProcessorStripe::chargeSuccess', function($e) {
  $user = wire()->user;
  $member = wire()->roles->get('member');
  $user->setAndSave('roles', $user->roles->add($member));
});
If you’ve got more than one form using Stripe payments then you’ll want to update any hook methods to check that it’s dealing with the expected form before proceeding. Add this as the first line in any hook method to double check that it’s the form you want:
if($event->object->formName != 'your-form-name') return;
These are just truncated examples of endless possibilities here.
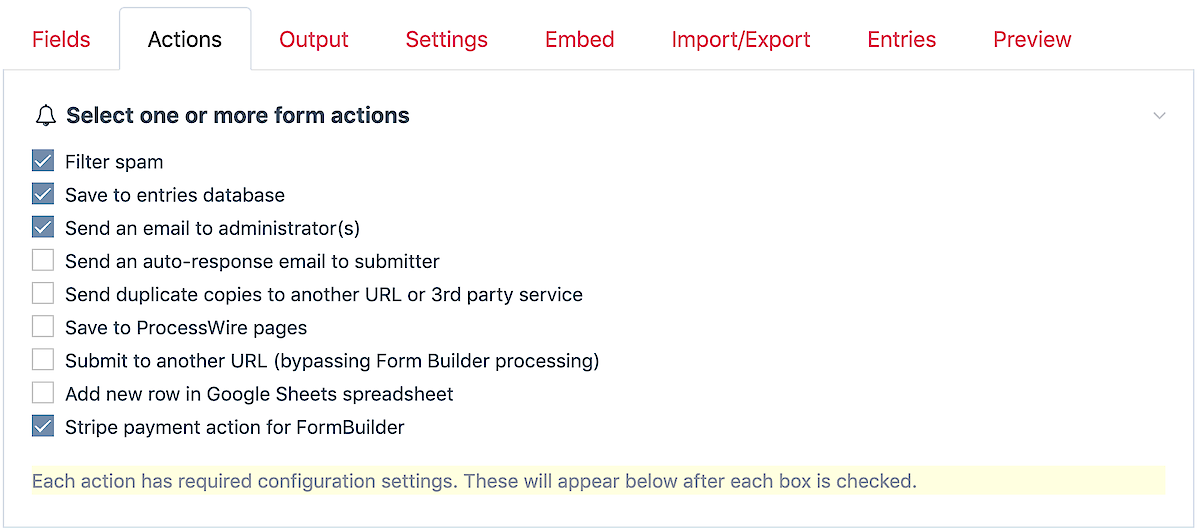
How it looks in the FormBuilder admin

Download and installation
This module is available to FormBuilder users with an active subscription. Module download, installation instructions and support are available in the FormBuilder support board. Because the module does not yet have much usage in production environments, it is initially being released as a beta version. The module also requires the latest version of FormBuilder v45 (0.4.5) also available for download in the FormBuilder board.
Thanks for reading! This module took me quite a bit longer to build than expected (3 weeks), so next week I hope to be catching up with some more core updates as well as other pending Pro module updates. Be sure to read the ProcessWire Weekly for the latest ProcessWire news and updates, and please be sure to subscribe if you haven't already.
Comments


Frank
- 4 years ago
- 96
★★★★★Truly awesome addition to an already awesome module.
Reply